Tuesday, 29 October 2013

Sew: The Quirky Top

So, I know it's been radio silence over here for a while but SO MUCH STUFF has gotten done around here, it kind of feels like I have a grown up house a little. Just a little.

Also, before we get started, photoshop has kicked the bucket on my computer, so you're just gonna have to deal with crappy photos. Womp womp.
Blending in...
I've been meaning to post this top for some while, maybe since August? Regardless, I won this fabric over from The Quirky Peach when Sally was doing her Spring Break Giveaway Challenge and was pretty pumped to get it because it was the fabric I voted for. Huzzah!

I got it in the mail and had no idea what to make with it. Eventually, when spring turned to summer and my life calmed down, I decided I was going to make me a top. So I present the Quirky Top.

I used the bodice from my staple, Simplicity 2444, but the altered copy I made for the Mad Men Challenge over here. That part more or less went okay. It was a little snug, but I could still squeeze into it.
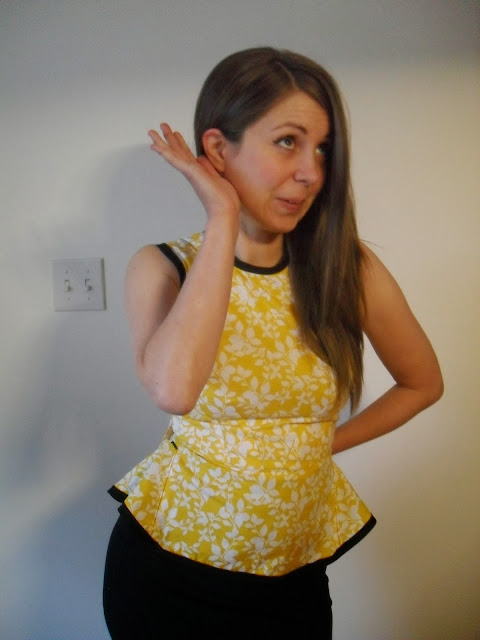
Workin' it just for your enjoyment.
Then the trouble started. I planned on making a flounce that would more or less be a peplum. I had just enough fabric to squeeze 'er out. It turned out fine, but when I attached it to my bodice...well.....it was WAY too tight. Uh oh. I had measure my hips where it was supposed to fall, and that part turnout out fine, but apparently, right after my waist, my body increases rapidly towards my hip size instead of gradually.

Well.......sh*t.

Now what? I can't just leave it.
So, I did what any self respecting seamstress would do and I added the weirdest little flap things into the sides in order to make room for my oddly expanding dimensions. I guess it works?
I used a big heavy metal jacket zipper for the back and a vintage button from my stash for the enclosure.
I wanted the peplum to go all the way around, hence the, ahem, interesting closure in the back. Whatevs, it works.
Yeah, I tried something at the bottom of that one seam and, yeah, I don't know....
Finally, I finished everything off with some black bias tape I bought from the store. I actually prefer making my own, but I was curious to see how store-bought would be.

Overall, I don't know if I'm going to get much wear out of this because, honestly, I think I realized I'm not a peplum girl, and also, I kind of have to take short breaths still! The peplum makes my hips look way bigger than they really are and I also like breathing. But, I learned how to use seam binding on the whole inside of this!!!!! Which is pretty flippin' awesome!

So if nothing else, that's pretty cool.

What about you? Have you ever made something that really doesn't suit you? Would you wear this top?

Thanks again, Sally!!! :)

{Yellow}

Sunday, 6 October 2013

This is Halloween.

So last year around this time I got started on an awesome little Halloween dress that I had planned on wearing if I had gotten a call into a school for supply work. However, it came so close to the wire that by the time I could take photos, it was on Halloween, and I didn't think that you guys would like to know how to make this AFTER it was already over. So I saved it for a year. Just for you.

I had a plan in my head. It didn't all happen. There wasn't enough time. But. The plan was this:
1. I wanted to create a knock-off version of these Louboutins:
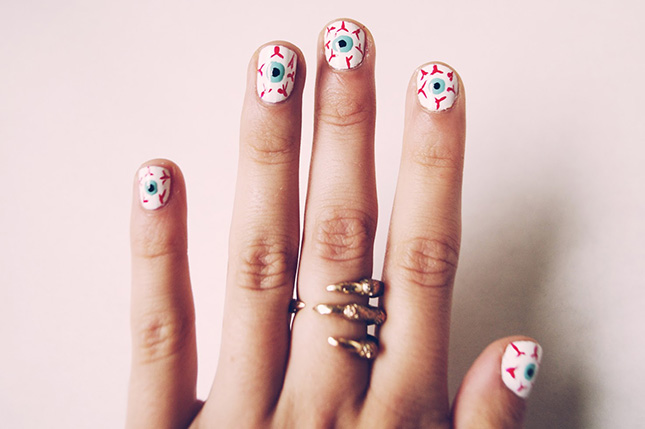
2. I wanted to do my nails like so:
3. I wanted to do my makeup like so:
or like so (eyes only):
4. I wanted some sort of a spider fascinator:
Via google images.
5. And I wanted to make a dress out of some Halloween-themed quilting cotton my aunt gifted me.

I didn't get around to doing the makeup, but I managed to do the rest! (Let's just chalk the lack of photoshop up to "Halloween mood enhancement", yes?)
This is me trying to take a picture of the side on my own.
I used my Simplicity 2444 bodice for the basis of this bodice, then sort of just winged it to create the side panels. For the skirt, because I only half a yard and a half (read: no mistakes), I used Gertie's gathered skirt tutorial (the same as for the Princess Peach Skirt), again, altering for the side panels. I used self made bias tape from scraps for all my raw edges (Except the armholes. Those remain unfinished to this day!).

For the headpiece, I bought a piece of waistband elastic, a small amount of netting, and used some scrap black fabric and pipecleaners to make the spider part. That was a pain in the butt. I had to sew the pipecleaners into the inside of the spider body and then somehow leave enough room to get them out when flipped right-side out. I used some holey old (but clean!) socks to stuff my spider with and hand stitched him closed. I glued on the googly eyes and then sewed him onto the elastic. From there, I placed the netting and hand tacked it in place here and there until I was satisfied. This took forever. The netting kept snagging on the spider legs!
So blurry!!!! AHH!
For the shoes, my aunt bought me a pair at Goodwill across the border for something like $2. I think all the fabric and whatnot for the fascinator cost around $8 and the googly eyes probably cost me about $12. So altogether this cost me $22 to make! Not bad!

To complete the look I teased my hair and put on some heavy eyeliner.

I was pretty pleased with how this turned out. And even though I didn't get a call for supply work, I was still able to wear this out to lunch in Niagara-on-the-Lake.

I'm not sure if I'll wear this out this year, I'll have to wait to see what my mood is, but I'll certainly wear it again in the future. Hooray for using up scraps!

What are you going to be for Halloween this year? Are you going to make your costume?

{This is Halloween}